
Peripheral Blood Smear
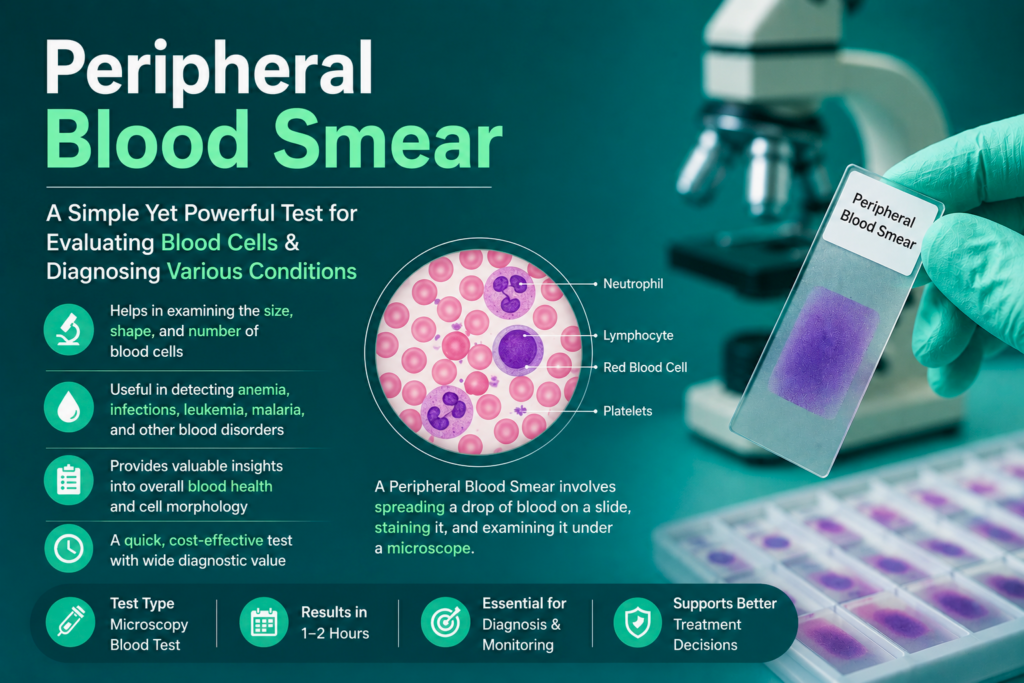
Table of Contents
Definition
The peripheral blood smear is a diagnostic tool where a thin layer of blood is spread on a glass slide, stained, and examined under a microscope. It allows for the qualitative assessment of the three primary cell lines: erythrocytes (RBCs), leukocytes (WBCs), and thrombocytes (platelets).
While analyzers provide the quantity, the smear provides the quality. It is the definitive method for identifying:
Abnormal cell morphology (e.g., schistocytes, sickle cells).
Intracellular parasites (e.g., Plasmodium species).
Immature cell populations (e.g., myeloblasts).
Clinical Significance
To understand the clinical significance of the peripheral blood smear (PBS), one must view it as a liquid biopsy. While an automated CBC provides the “what” (quantitative data), the PBS provides the “why” (pathophysiological context).
Below is a detailed breakdown of the clinical significance across the three major cell lines.
1. Erythrocyte (RBC) Morphology: Anemia & Beyond
RBC morphology is often the first clue in differentiating complex anemias and systemic diseases.
Size Variations (Anisocytosis):
Microcytosis: Often signifies iron deficiency anemia, thalassemia, or lead poisoning.
Macrocytosis: Classic for Vitamin B12 or Folate deficiency (megaloblastic) or chronic liver disease (non-megaloblastic).
Shape Variations (Poikilocytosis):
Schistocytes (Fragmented Cells): A critical value finding. Their presence indicates Microangiopathic Hemolytic Anemia (MAHA), such as TTP, DIC, or HUS. This is a medical emergency.
Spherocytes: Indicative of Hereditary Spherocytosis or Warm Autoimmune Hemolytic Anemia (WAIHA).
Sickle Cells (Drepanocytes): Diagnostic for Sickle Cell Disease.
Target Cells (Codocytes): Commonly seen in Thalassemia, obstructive liver disease, and post-splenectomy states.
Inclusions:
Basophilic Stippling: Associated with lead poisoning or sideroblastic anemia.
Howell-Jolly Bodies: Small DNA remnants indicating splenic dysfunction or asplenia.
Malaria Parasites: The PBS (thick and thin films) remains the definitive method for identifying Plasmodium species and calculating parasite density.
2. Leukocyte (WBC) Differential: Infection vs. Malignancy
The WBC differential is vital for distinguishing between a benign “left shift” and a hematologic malignancy.
Neutrophilia & Shift to the Left:
Increased bands, metamyelocytes, and myelocytes usually indicate a severe bacterial infection or inflammatory response.
Toxic Granulation & Döhle Bodies: Visible indicators of “cytokine-induced” accelerated granulopoiesis, typical of sepsis.
Lymphocytosis:
Reactive Lymphocytes: Large, indented cells (Downey cells) often seen in Infectious Mononucleosis (EBV) or viral hepatitis.
Malignant Lymphocytes: Small, mature-looking lymphocytes with “cracked-earth” chromatin (Smudge cells) are hallmarks of Chronic Lymphocytic Leukemia (CLL).
Blast Cells:
The presence of Myeloblasts or Lymphoblasts on a peripheral smear is often the first indication of Acute Leukemia (AML or ALL). Identifying Auer Rods is pathognomonic for myeloblasts.
3. Thrombocyte (Platelet) Evaluation
Automated counters often struggle with abnormal platelet sizes or arrangements.
Pseudothrombocytopenia: A “false low” platelet count caused by EDTA-induced platelet clumping. The PBS is used to verify if clumps are present, which prevents unnecessary transfusions.
Giant Platelets: Seen in Bernard-Soulier Syndrome or during periods of rapid platelet turnover (e.g., recovery from ITP).
Platelet Satellitism: Platelets adhering to neutrophils; an in-vitro phenomenon that requires re-collection in a sodium citrate tube for an accurate count.
4. Systemic & Multi-Organ Insights
The blood smear often reflects non-hematologic systemic health:
Liver Disease: Noted by the presence of target cells and acanthocytes (spur cells).
Renal Failure: Often characterized by Burr cells (Echinocytes) due to uremia.
Hyposplenism: Marked by a “dirty” looking slide with multiple inclusions (Pappenheimer bodies, Howell-Jolly bodies) and nucleated RBCs.
Summary of Critical “Alert” Findings
In a clinical setting, the following PBS findings require immediate pathologist review and physician notification:
Blasts (any number).
Schistocytes (significant numbers suggesting MAHA).
Intracellular parasites (Malaria, Babesia).
Auer Rods.
Severe Neutropenia or extreme Leukocytosis (Hyperleukocytosis).
Methodology and Principle
1. Principles of the Blood Smear
The methodology is rooted in two distinct scientific principles: Fluid Thin-Film Dynamics and Romanowsky’s Principle of Polychromic Staining.
A. The Physical Principle (Wedge Technique)
The creation of a monocellular layer (the “Zone of Morphology”) relies on capillary action and frictional forces. When a spreader slide is placed into a drop of blood, surface tension pulls the blood across the edge of the spreader.
The resulting thickness of the smear is a function of:
Angle: A steeper angle ( >45°) creates a shorter, thicker smear. A shallower angle ( <30°) creates a longer, thinner smear.
Speed: Faster spreading results in a thicker film; slower spreading results in a thinner film.
Pressure: Excessive pressure creates mechanical artifacts and “feathered edge” streaks.
B. The Chemical Principle (Romanowsky Staining)
Most clinical labs use Wright-Giemsa stain. This is a “polychromatic” stain, meaning it produces multiple colors based on the acidity or alkalinity of the cellular components.
Methylene Blue (Basic Dye): Carries a positive charge. It binds to anionic (acidic) structures like nucleic acids (DNA/RNA) and nucleoproteins, staining them blue to purple.
Eosin Y (Acidic Dye): Carries a negative charge. It binds to cationic (basic) structures like hemoglobin and eosinophilic granules, staining them red to orange-pink.
The Buffer Principle: The reaction is highly pH-dependent. At a pH of 6.4–6.8, the dyes are optimally ionized to balance the staining of both acidic and basic components.
2. Methodology: Step-by-Step Procedure
Phase I: Specimen Collection and Quality Check
Anticoagulant: Use EDTA (lavender top) whole blood.
Timing: Smears should be made within 2–3 hours of collection to prevent vacuoles in neutrophils and “echinocytic” changes in RBCs.
Mixing: Invert the tube 10–15 times immediately before dispensing.
Phase II: Slide Preparation (Manual Wedge Method)
Placement: Place a 3–5 µL drop of blood approximately 1 cm from the frosted end of a clean glass slide.
Contact: Place the spreader slide at a 30° angle in front of the drop. Pull the spreader back until it touches the drop.
Capillary Spread: Wait for the blood to spread along the entire width of the spreader slide edge.
The Stroke: Push the spreader forward with a steady, fluid motion. Do not stop until the smear is complete.
Drying: Rapidly air-dry. In humid environments, a handheld fan or warm (not hot) dryer is used to prevent water artifacts (refractile rings on RBCs).
Phase III: Staining Procedure (Wright-Giemsa)
Fixation: Dip or flood the slide with absolute methanol for 30–60 seconds. This dehydrates the cells and adheres them to the glass.
Staining: Apply the Wright-Giemsa stain for 1–3 minutes.
Buffering: Add an equal volume of phosphate buffer (pH 6.4). Blow gently to mix until a metallic “green sheen” appears on the surface. Let stand for 3–5 minutes.
Rinsing: Wash with deionized water or buffer.
Drying: Wipe the back of the slide and stand it upright to air-dry.
3. Evaluation of a “Well-Made” Smear
Before proceeding to the microscope, the smear must meet these visual criteria:
Length: Covers 2/3 to 3/4 of the slide length.
Shape: Transition from a thick “head” to a smooth, thumb-shaped “feathered edge.”
Appearance: No waves, holes, or longitudinal streaks.
Microscopic check: Under 10x, the cells in the feathered edge should be distributed evenly without clumping.
4. Troubleshooting Methodology Errors
| Observation | Probable Cause | Methodological Correction |
| Holes in the film | Grease or fingerprints on the slide | Use pre-cleaned, lint-free slides. |
| Smear is too short | Spreader angle too steep or stroke too fast | Decrease angle; slow down the stroke. |
| Cells are “Flat” or “Refractile” | Slow drying in high humidity | Use a fan to speed up drying. |
| Platelet clumping | Poor mixing or EDTA sensitivity | Mix thoroughly; redraw in sodium citrate if needed. |
Specimen Requirements
To ensure the clinical validity of a peripheral blood smear, the pre-analytical phase—specifically specimen collection and handling—is the most critical step. Errors at this stage cannot be “fixed” by expert microscopy.
Below are the detailed specimen requirements for a diagnostic-grade peripheral blood smear.
1. Primary Specimen: EDTA-Anticoagulated Whole Blood
The gold standard for routine hematological morphology is K2-EDTA (dipotassium ethylenediaminetetraacetic acid) or K3-EDTA.
Mechanism: EDTA acts as a chelating agent, binding calcium ions (Ca^+2) in the blood. Since calcium is a necessary cofactor in the coagulation cascade (Factor IV), its removal prevents the blood from clotting.
Why EDTA?: Unlike heparin (which causes a blue background tint) or citrate (which dilutes the sample), EDTA preserves the morphology of leukocytes and erythrocytes with minimal distortion for a specific window of time.
2. Timing and Stability Constraints
The “freshness” of the blood is paramount. Cellular degradation begins the moment the blood leaves the body.
Optimal Window: Smears should ideally be prepared within 2 hours of collection.
Maximum Limit: Smears must be made within 4 to 6 hours if stored at room temperature (20-25 C).
Refrigeration (2-8 C): If the smear cannot be made immediately, the specimen can be refrigerated for up to 24 hours. However, the blood must be allowed to return to room temperature and be mixed thoroughly before slide preparation.
Risk of Delay:
Neutrophils: Develop nuclear lobulations and cytoplasmic vacuoles (mimicking sepsis).
Monocytes: Develop vacuoles and nuclear irregularities.
RBCs: Can become echinocytic (crenated), making it difficult to distinguish them from true pathological poikilocytes.
3. Specimen Volume and Container Integrity
Fill Volume: The vacuum tube must be filled to its stated capacity (e.g., 4.0 mL in a standard lavender top).
Under-filling: Leads to an excess of EDTA relative to the blood volume. This high concentration of anticoagulant causes RBCs to shrink (crenate), leading to a falsely decreased Hematocrit and Mean Corpuscular Volume (MCV).
Mixing: The tube must be inverted gently 8–10 times immediately after collection. Vigorous shaking causes hemolysis, rendering the smear unreadable.
4. Alternative Specimen Types
A. Capillary (Skin Puncture) Blood
In neonates, pediatric patients, or patients with difficult venous access, capillary blood is used.
Advantage: Direct collection onto the slide (no anticoagulant) eliminates EDTA-induced artifacts like platelet satellitism.
Requirement: The first drop of blood must be wiped away to remove tissue fluids. The second drop is used for the smear. Slides must be made at the bedside immediately before the blood clots.
B. Sodium Citrate (Blue Top) Blood
Indication: Used only when EDTA-induced platelet clumping (pseudothrombocytopenia) is suspected.
Requirement: Because the liquid citrate dilutes the blood, the platelet count obtained from a citrate tube must be multiplied by 1.1 to provide an accurate estimate.
5. Summary of Rejection Criteria
A specimen should be rejected and a redraw requested if:
Clotted: Even a micro-clot invalidates the cell counts and the smear morphology.
Hemolyzed: Indicates mechanical stress or poor collection technique.
Mislabeled: Non-negotiable safety violation.
Insufficient Volume (QNS): Leads to EDTA-induced cell shrinkage.
Old Specimen: Exceeding the 6-hour room temperature or 24-hour refrigerated limit.
6. Slide Labeling Requirements
Each slide must be permanently labeled on the frosted end with:
Two unique patient identifiers (Full Name and Medical Record Number/DOB).
Date and time of collection.
Initials of the technologist who prepared the smear.
Reference Ranges & Clinical Interpretations
Interpreting a peripheral blood smear requires a synthesis of quantitative data (the numbers from the analyzer) and qualitative observations (what you see under the lens). Reference ranges for morphology are generally “Normal” or “Negative,” as the presence of abnormal shapes or inclusions usually indicates a pathological state.
Below is a detailed breakdown of reference parameters and their clinical correlations.
1. Erythrocyte (RBC) Interpretation
In a healthy adult, RBCs should be uniform in size (Normocytic) and color (Normochromic), with a central pallor occupying approximately 1/3 of the cell diameter.
| Finding | Reference/Threshold | Clinical Interpretation |
| Size (MCV) | 80–100 fL | Microcytosis (<80): Iron deficiency, Thalassemia.
Macrocytosis (>100): B12/Folate deficiency, Liver disease. |
| Color (MCHC) | 32–36 g/dL | Hypochromic: Iron deficiency (large central pallor).
Hyperchromic: Spherocytosis (no central pallor). |
| Anisocytosis | RDW <14.5% | High RDW indicates a diverse population of cell sizes (e.g., early iron deficiency). |
| Polychromasia | 0.5%–2.0% | Indicates young RBCs (reticulocytes). High levels suggest the bone marrow is responding to blood loss or hemolysis. |
2. Leukocyte (WBC) Differential Reference Ranges
While “normal” ranges can vary slightly by laboratory and patient age, the following are standard adult relative and absolute ranges.
| WBC Type | Relative Range (%) | Absolute Range (×109/L) | Clinical Interpretation of High Levels |
| Neutrophils | 40% – 75% | 1.8 – 7.0 | Bacterial infection, inflammation, or physical stress. |
| Lymphocytes | 20% – 45% | 1.0 – 4.8 | Viral infections (EBV, CMV), CLL, or pertussis. |
| Monocytes | 2% – 10% | 0.1 – 0.8 | Chronic infections (TB), recovery phase of acute infection. |
| Eosinophils | 1% – 4% | 0.0 – 0.4 | Allergic reactions, parasitic infections, or asthma. |
| Basophils | 0.5% – 1% | 0.0 – 0.2 | Chronic Myelogenous Leukemia (CML) or myeloproliferative disorders. |
Significant Morphological Shifts:
Left Shift: The presence of immature neutrophils (bands, metamyelocytes). A “regenerative” left shift accompanies a high WBC count (infection); a “degenerative” left shift occurs with a low WBC count (overwhelming sepsis).
Hypersegmentation: Neutrophils with 6 lobes. This is a hallmark of Megaloblastic Anemia.
3. Platelet Estimate & Interpretation
The manual platelet estimate is a vital quality control step to verify the automated count.
Reference Range: 150-450 10^9/L.
The 100x Oil Estimation Formula:
Platelets/yL = Average Platelets per Field (in 10 fields) x 15,000Clinical Interpretations:
Thrombocytopenia (<150): May be due to ITP, sequestration in the spleen, or bone marrow failure. Check for clumping on the smear to rule out “Pseudothrombocytopenia.”
Thrombocytosis (>450): Associated with iron deficiency, post-splenectomy, or Essential Thrombocythemia.
Large/Giant Platelets: Indicates premature release from the marrow, common in ITP or Bernard-Soulier Syndrome.
4. Critical “Panic” Values on Peripheral Smear
If the following are identified, they represent a significant clinical risk and must be reported immediately:
Blast Cells: Any percentage of blasts in a peripheral smear is abnormal and suggests acute leukemia.
Schistocytes: Even a small percentage (>1%) is clinically significant for Microangiopathic Hemolytic Anemia (MAHA).
Intracellular Parasites: Presence of Plasmodium (Malaria), Babesia, or Trypanosoma.
Sickle Cells: New discovery of sickle cells in a patient without a previous diagnosis.
Auer Rods: Crystallized granules in the cytoplasm of myeloblasts, confirming Acute Myeloid Leukemia (AML).
5. Summary of Clinical Correlations (The “Triad” Check)
When interpreting the smear, always correlate the three cell lines. For example:
Low RBC + Low Platelets + Blasts —-> Suggestive of Acute Leukemia.
Low RBC + High RDW + Hypochromia —-> Suggestive of Iron Deficiency Anemia.
Normal WBC + Schistocytes + Low Platelets —-> Suggestive of TTP/HUS.
Quick Stats
| Feature | Details | Critical Lab Insights |
| Test Type | Morphological Qualitative Analysis | The “Gold Standard” for validating automated CBC flags. It provides a visual snapshot of hematopoiesis and cellular pathology. |
| Sample Type | EDTA Whole Blood (Lavender Top) | EDTA is the anticoagulant of choice. It prevents platelet clumping and preserves the structural integrity of leukocytes and erythrocytes. |
| Stability Window | < 2 Hours (Optimal) | Slides should be made within 2 hours of collection. Beyond 4–6 hours, neutrophils become vacuolated and RBCs show crenation (echinocytes). |
| Primary Metric | WBC Differential & Morphology | Categorizes 100 white cells by type and assesses RBC/Platelet morphology. Unlike the analyzer, the human eye detects subtle dysplastic changes. |
| The “Wedge” Rule | 30° to 45° Angle | The spreader slide angle must be adjusted based on Hematocrit: Decrease angle for high Hct (polycythemia); Increase angle for low Hct (anemia). |
| Staining Method | Wright-Giemsa (Romanowsky) | Relies on the pH-dependent (6.4–6.8) binding of Methylene Blue (acidic components) and Eosin (basic components) for color differentiation. |
| Zone of Morphology | The “Monolayer” | The critical area just behind the feathered edge where RBCs are barely touching but not overlapping. This is the only valid zone for evaluation. |
| Critical Values | Blasts, Schistocytes, Parasites | Any presence of Myeloblasts, Schistocytes ($>1\%$), or Malaria parasites requires immediate pathologist review and “Panic Value” notification. |
| Platelet Estimate | Avg (10 fields) × 15,000 | Essential for verifying automated thrombocytopenia. If platelets are clumped on the smear, the automated count is falsely low (Pseudothrombocytopenia). |
| Key Limitation | Subjectivity & Sampling | Results are highly dependent on the technologist’s expertise and the quality of the smear. A poor “spread” can lead to uneven cell distribution. |
| Turnaround Time | 20–40 Minutes | Includes slide preparation, air-drying, staining, and microscopic review. Often prioritized for “STAT” differential requests. |
FAQs
1. Why is a peripheral blood smear performed if I already have a CBC?
While a Complete Blood Count (CBC) provides accurate numbers (quantitative data) through automated flow cytometry, it cannot always identify specific shape abnormalities (qualitative data). A PBS is performed to:
Identify specific abnormal cells like blasts or schistocytes.
Confirm “flags” from the analyzer (e.g., suspected platelet clumping).
Search for blood-borne parasites like Malaria or Babesia.
2. What does a “shift to the left” mean on a blood smear?
A “left shift” indicates an increased number of immature neutrophils (such as bands, metamyelocytes, and myelocytes) in the peripheral blood. This is most commonly a physiological response to a severe bacterial infection or acute inflammation, as the bone marrow releases younger cells to meet the body’s demand.
3. Can a peripheral blood smear diagnose leukemia?
A PBS is often the first tool to suggest a diagnosis of leukemia by identifying immature blast cells or malignant lymphocytes. However, while it is a critical screening step, a definitive diagnosis usually requires follow-up testing, such as bone marrow aspiration, flow cytometry, or cytogenetic analysis.
4. What causes a blood smear to look “too blue” or “too red”?
This is usually a result of a pH imbalance during the staining process:
Too Blue: The buffer or stain pH was too alkaline, or the washing was insufficient.
Too Red: The buffer or stain pH was too acidic, or the washing was excessive. Properly stained slides should have pink-to-tan RBCs and purple-blue leukocyte nuclei.
5. Why must the smear be made within 2 hours of collection?
Extended exposure to EDTA anticoagulant causes “storage artifacts.” Over time, neutrophils develop vacuoles and their nuclei may become pyknotic, while red blood cells can shrink and develop artificial spikes (echinocytes). To ensure the most accurate diagnostic morphology, early preparation is essential.
6. What is the “feathered edge” and why is it important?
The feathered edge is the very end of the blood smear where the cells are spread most thinly. It is important because large, heavy abnormalities—such as platelet clumps, microfilariae, or large blast cells—are often pushed to this outer limit during the spreading process.